Instructor: Steve Wetzel
EQ in action
BE sure, when equalizing in Audacity, that you mix your edit down (export edit
as a stereo track, as a .wav), title the export (something like Rantv1_EQ1), save to
export folder in your rant folder. Then open this mixed down, exported .wav in
Audacity; EQ this file, NOT your original edit!
Here is an example of equalization "in action".
Recording 1 is the original recording (from our class), with all its dynamics and
space. I applied a harsh equalization, cutting all frequencies below 80 Hz and above,
roughly, 800 Hz. I just got rid of tons of frequencies; all that's left are
the mid frequencies, and, thus, the sound becomes something completely
different.
Click on image to hear
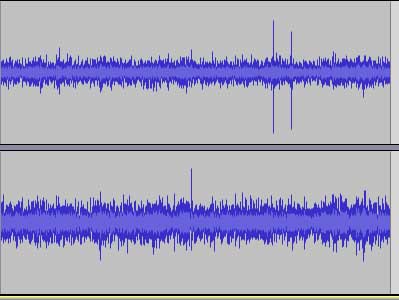 Recording 1
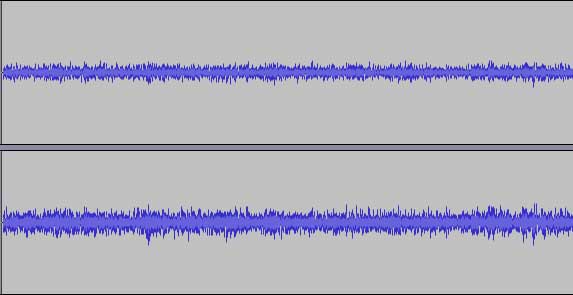 Recording 2 (after EQ)
Notice how the waveform loses its dynamic, its variation in
height, from Rec 1 to Rec 2.
To do the above, I made a custom EQ setting, a custom High Pass (to learn more about "High Pass", read on).
To access the EQ filter, go to Effects > Equalization. A window like pic 1 appears.
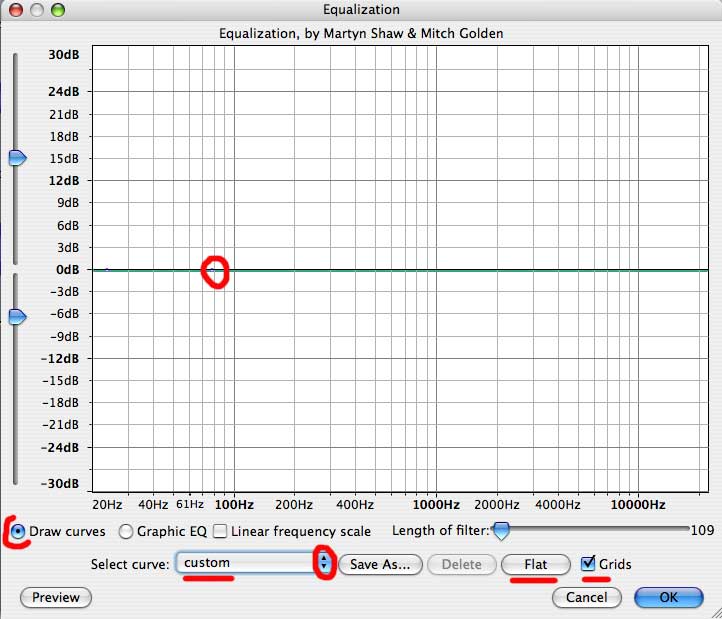 pic 1
pic 1Select Draw curves, custom, Grids, then click Flat. You can drag out the size of the EQ grid and make it longer or bigger
(expand the EQ window); this will make more frequencies visible. Once you've selected the above properties (Draw curves,
etc.) you can make automated points and create your own EQ graph. Click on the EQ line (the bold blue and green line at 0db)
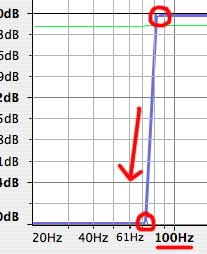
to make automation points. To cut out frequencies below 80Hz, make two points, one at 80Hz and one to the left of 80Hz,
then drag the leftmost point to -30db (pic 2)
 pic
2
pic
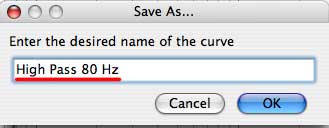
2To save your EQ graph, in this case it's essentially a High Pass filter (High Pass means that
all frequencies above the selected frequency, 80 Hz, will be left alone -- left to pass; all frequencies
below the selected frequency will be attenuated, or reduced, or cut), select Save as, then title it
according to the nature of the graph (pic 3 (again, in my case it's an 80 Hz High Pass)).
 pic
3
pic
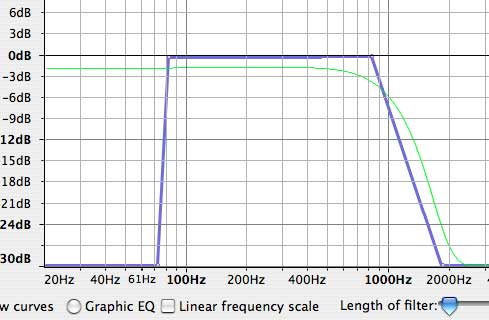
3To achieve the sound in Rec 2 above, I, in addition to the 80 Hz high pass, attenuated
frequencies above 800 Hz, thus cutting much of the sound's upper register -- all of its
warmth and presence. The EQ graph for this looks like pic 4
 pic 4
pic 4A more discriminating use of EQ would subtly minimize some frequencies
while slightly boosting others (the example above is a way to radically distort
sound).
As you continue to make work, you may say, "How do I get rid of
that tinny, sizzling sound in my mix?" You try and find where the tinniness
and sizzling exist among the frequencies and extract it or minimize it through
equalization. Now, by default, other sounds exist among those
same frequencies, so minimizing the tinniness will
minimize other qualities as well.
EQing a voice can be tedious, and will take some time. Some times you don't
EQ at all; this is the case when you just simply make a great vocal recording.
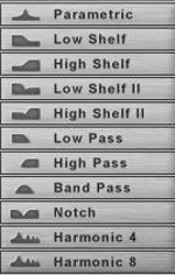
Here is a little image that graphically explains passes (also called cuts) and shelves:
